What You Get
By connecting your Bedrock knowledge bases to Rippletide, you can:- Visualize your knowledge base as an interactive context graph
- Define processes and workflows on top of your existing data
- Add guardrails to enforce safety and compliance rules
- Test and evaluate your agent’s responses before going live
- Deploy via MCP to plug your agent into any MCP-compatible client
Prerequisites
- An Amazon Bedrock Knowledge Base (active, with data sources)
- AWS credentials with the required permissions (see below)
- A Rippletide account
Step 1: Prepare Your AWS Credentials
Gather the following from your AWS account:- AWS Access Key ID
- AWS Secret Access Key
- AWS Region where your knowledge base is deployed (e.g.,
us-east-1) - Knowledge Base ID (found in the Bedrock console)
Required IAM Permissions
The IAM user or role associated with your credentials needs the following permissions:Step 2: Create an Agent on Rippletide
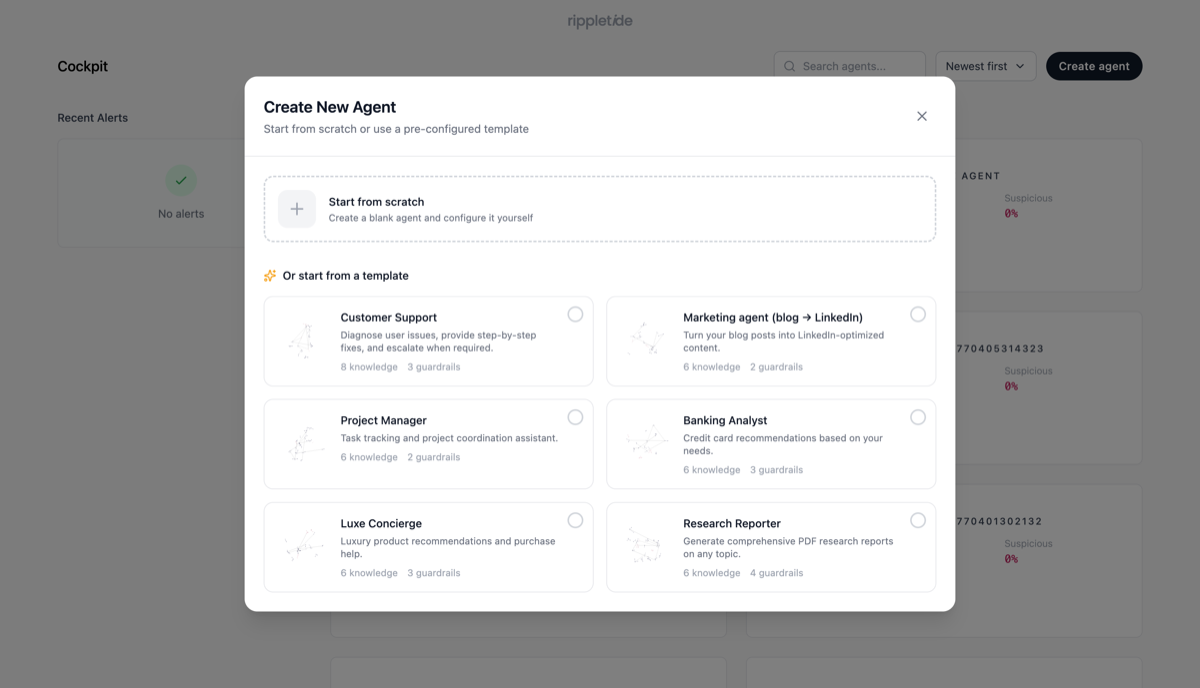
- Go to app.rippletide.com and sign in
- Click “Create Agent” then “Start from scratch”
- Give your agent a name and click “Continue to Knowledge”
Step 3: Connect Your Bedrock Knowledge Base
- In the Knowledge section, select “Other Connectors”
- Choose “AWS Bedrock”
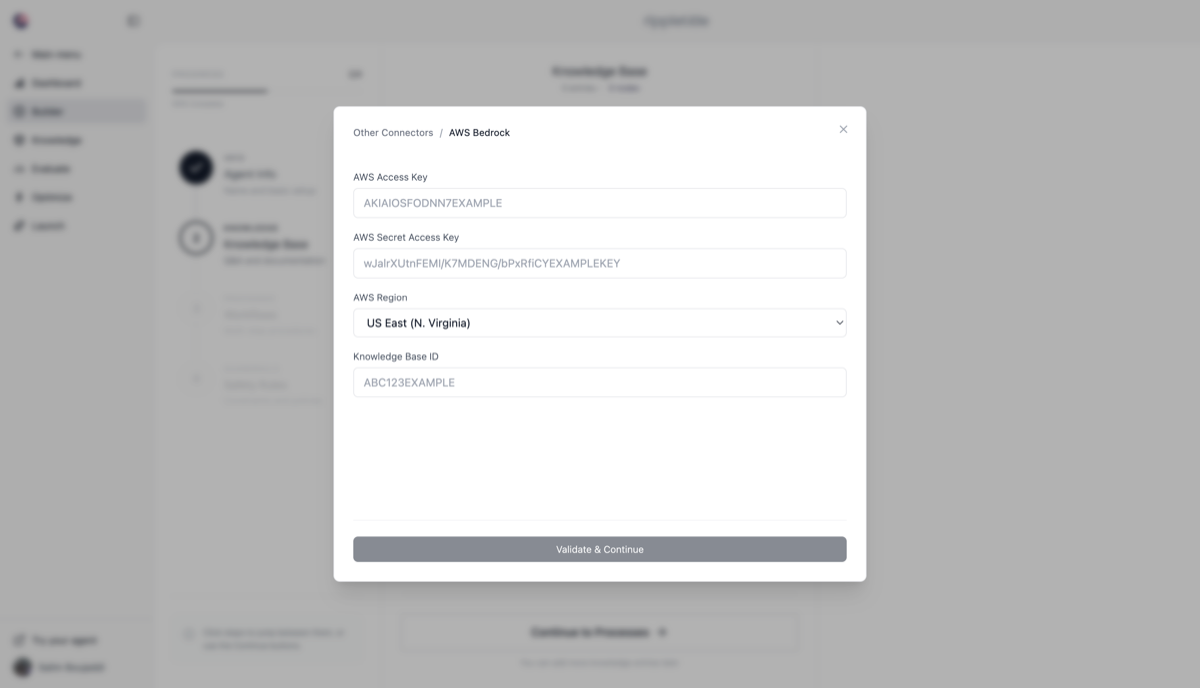
-
Enter your AWS credentials:
- AWS Access Key
- AWS Secret Access Key
- AWS Region
- Knowledge Base ID
- Select the data sources you want to import and click “Continue”
Step 4: Configure and Test
- Once the import completes, your knowledge base is visualized as a graph in the “Knowledge” tab
- Click “Continue to Processes” to define agent workflows
- Click “Continue to Guardrails” to set up safety and compliance rules
- Test your agent directly in Rippletide to validate responses
Troubleshooting
Connection Issues
- Verify your AWS credentials are correct and active
- Confirm the IAM user has the required Bedrock permissions listed above
- Check that the Knowledge Base ID exists in the specified region
- Make sure Amazon Bedrock is available in your selected AWS region
Data Import Failures
- Verify the knowledge base contains at least one data source
- Ensure the knowledge base is in an active state in the Bedrock console
- Check AWS CloudWatch logs for detailed error messages
Next Steps
- Deploy your agent via MCP to use it in Claude Desktop, Cursor, VS Code, and more
- Set up advanced guardrails for production-ready safety controls
- Monitor agent performance and usage analytics from the Rippletide dashboard